Choosing the right measurement techniques for your products will enhance quality control while also improving productivity, accuracy, and overall production line performance. You can also reduce costs and get enhanced return on investment. In this blog, we will explore the main measurement techniques and technologies with a particular emphasis on their application in the medical device industry.
In terms of selecting the right option for your facility, factors you should consider include:
- Cost and ROI.
- Ease of integration (off-line, near-line, or in-line, as well as process integration).
- Speed of inspection and the impact this has on the quality department and production line.
- Required operator involvement, as well as skills and training requirements.
- Calibration requirements.
- Measurement characteristics including accuracy and required tolerances.
Location of Inspection
Products and components can be measured and inspected in three main locations:
- Off-line – this is typically a metrology lab or similar location with specialist measurement and inspection equipment.
- Near line – where the inspection equipment is located on the shopfloor close to the production line to improve speed and productivity, and, often, to enhance automation.
- In-line – where products or components are inspected and measured directly on the production line as part of the manufacturing process.
Manual, Semi-Automated, or Automated
The measurement and inspection of products and components in medical device manufacturing facilities has traditionally been a largely manual process. Levels of automation are becoming more common with advanced software programs and innovative technologies, such as modern vision systems and auto-rotational fixtures.
In fact, by combining a CMM or vision system with an auto-rotational fixture and bespoke software program, inspection and measurement processes can be almost fully automated. This applies even when the parts and products being inspected are complex and intricate.
By moving the inspection process near-line or in-line, full automation can be achieved.
CMMs and Vision Systems
CMM Inspection Techniques
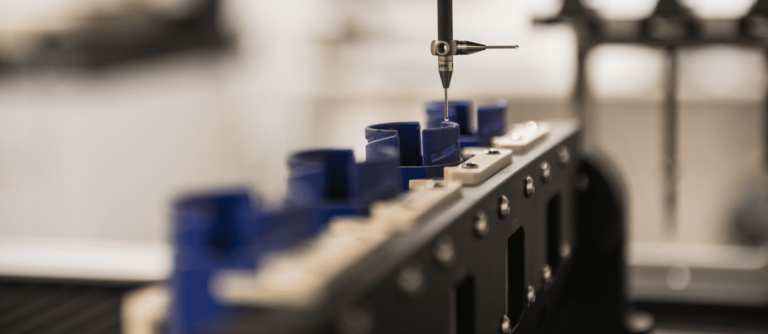
CMMs (coordinate measuring machines) are commonly used for quality control in a range of industries, including medical device manufacturing. They use probes to measure the physical geometrical characteristics of a product or component. Probes can be mechanical, optical, laser, or white light. CMMs take measurements in three-dimensional space and deliver optimum levels of performance when combined with a custom fixture and program.
There are three main methods:
- Touch-trigger CMM – acquires data points by coming into contact with the component or product being inspected. This happens repeatedly until the full product is inspected, i.e., the probe comes into contact with the product, takes the measurement, and moves to another location. This technique is sometimes referred to as the woodpecker approach.
- Tactile scanning CMM – similar to a touch-trigger solution except the probe is moved along the surface of the component once contact is made. As a result, this measurement technique captures more data than touch-trigger solutions, making it ideal for complex products and components.
- 5-axis scanning CMM – delivers high levels of accuracy as both the probe head and the CMM machine can move during the inspection routine. Inspections are also faster because of the flexible way this technique captures data points.
Vision Systems
Vision systems use cameras and image processing software to inspect and analyse products or components. They enable contactless measurement and inspection with faster inspection routines, particularly when a bespoke fixture is used.
Vision systems can be incorporated into the production line as well as in the metrology lab, so they are suitable for both off-line and in-line applications, depending on requirements. Vision systems are also recommended over CMMs when inspecting smaller components or parts, particularly those with features under 5mm.
It is also important to note that it is possible to integrate CMM functionality with some vision systems, creating an enhanced inspection tool.
Other Technologies
3D Scanners
3D scanning machines create precise 3D models of the components or products that are being inspected. There is a range of 3D scanning technologies available, including laser scanning solutions as well as white light and blue light solutions.
White light and blue light scanners typically capture more data points during a scan compared to equivalent laser scanners. They therefore create 3D representations of the product or component that are more detailed and accurate, particularly for smaller components. White light scanners are also faster.
CT and X-Ray Inspection
Inspecting the internal structures and features of a component or product presents a range of challenges. In some situations, destructive testing is needed to achieve the required level of precision. CT inspection and X-ray inspection are alternative solutions.
Industrial metrology CT (computer tomography) and X-ray technologies enable high-precision inspections of complex and intricate parts, including internal structures and features. All elements of the component can be scanned and inspected non-destructively using CT and X-ray inspection technologies.
Applications for CT and X-ray inspection solutions include dimensional metrology of internal structures and features, as well as assembly control, failure analysis, and more.
In-Machine Probing
In-machine probing uses scanning probes and, in some situations, traditional touch probes. It is a process that verifies parts directly on the manufacturing line before they come off the machine. Checking components during the manufacturing process helps ensure part accuracy while reducing scrap and minimising lost time.
One of the main downsides is that a machine on the manufacturing floor can’t manufacture as quickly if it has to stop to take measurements. This makes it a measurement technique that is more relevant in industries like aerospace and automotive. In the medical device industry, it can be beneficial when manufacturing very expensive parts, such as custom medical devices, as it can identify deviations during the production process rather than just at the end.
Spectrophotometers
Spectrophotometers are used to measure the intensity of light in a part of the spectrum, so they can be used for precise colour measurement, e.g., ensuring the consistency of colour across all products.
Terahertz Imaging
Terahertz imaging systems utilise terahertz radiation (terahertz radiation is between microwaves and infrared on the electromagnetic spectrum) to identify defects and structural irregularities in materials.
Atomic Force Microscopy
Atomic force microscopy (AFM) can measure nanoscale features by “feeling” the surface of a component or product with a mechanical probe. In the medical device industry, AFM is typically combined with other techniques as it is slow and can only analyse small areas at a time. Relevant applications include surface roughness analysis, nanoscale defect detection, material property analysis, and analysis of the degradation process in biodegradable materials (including implants).
Enhancing Quality Control in Your Facility
There is a broad range of options available when it comes to the measurement and inspection of medical device components and products. There are also considerable product quality, production line performance, and quality department productivity benefits that can be achieved by matching measurement techniques with your specific requirements.
We can help with our expertise at Verus Metrology, plus we can enhance many of the main measurement and inspection technologies with the development and implementation of advanced metrology fixtures. Get in touch today to find out more.


